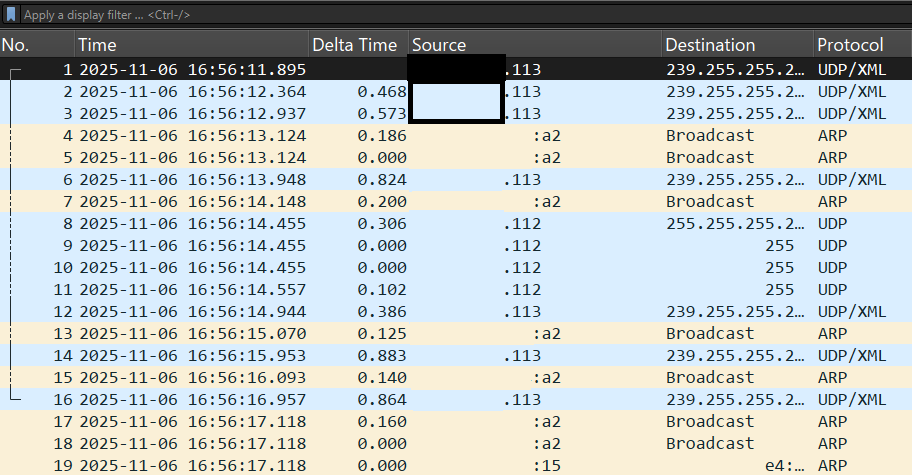
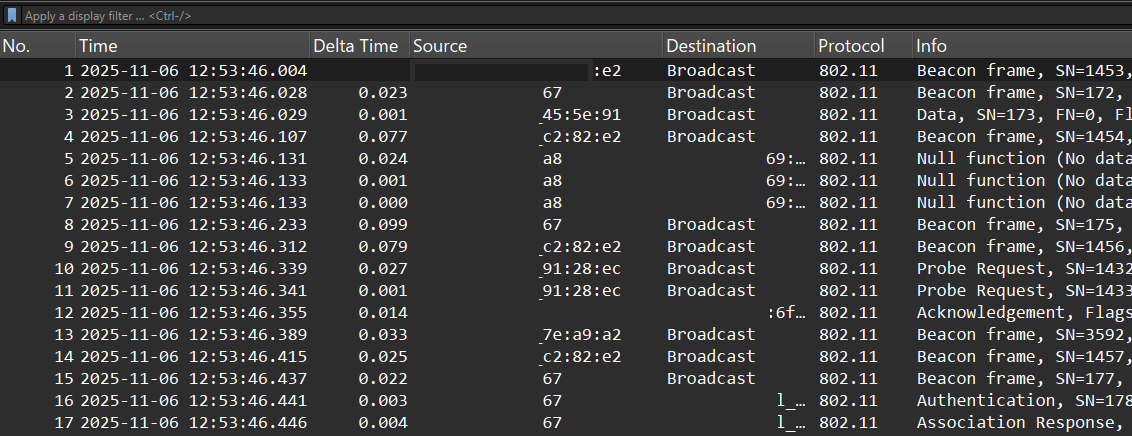
You need to perform in-depth Wi-Fi analysis. Using a Linux distribution like Ubuntu, Linux Mint, or Raspberry Pi OS, you want to capture layer 2 802.11 frames. However, when you begin capturing on your Wi-Fi interface, this is what you observe:
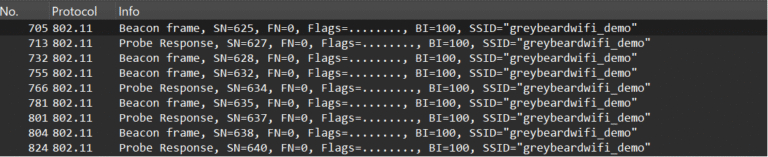
You might think, “Hey, this doesn’t look like typical 802.11 Wi-Fi layer 2 frames!” (Note: the image has been anonymized—regular captures will display MAC and IP addresses). So, how do IT professionals capture packet data that includes 802.11 layer 2 frames? They do it just like this:
That’s where monitor mode plays a crucial role.
What is monitor mode and what are the requirements?
Simply put, monitor mode allows your Wi-Fi adapter to listen to all traffic without needing to connect to any network. It’s like giving your adapter enhanced super-hearing capabilities. This matters because without monitor mode, analysis and troubleshooting with tools such as Wireshark won’t be able to decode the 802.11 Wi-Fi layer 2 frames.
In order for this to work, the following is needed:
Supported Wi-Fi interface (chipsets like Atheros, Ralink, Realtek are often better). Note: some built in Wi-Fi interfaces like Broadcom or Intel may not support monitor mode.
Basic terminal/command line interface knowledge.
3 methods to put your Wi-Fi interface into monitor mode
Manual Linux WiFi Monitor Mode Using ip link
Using ip link/iw dev is a more contemporary method of enabling your Wi-Fi adapter to be in monitor mode. Here are the steps using this method:
First, check your interface status with iwconfig <your interface>. This helps identify which interface you want to modify.
Next, bring the interface down using:: sudo ip link set <your interface> down.
Then, enable monitor mode:: sudo iw dev <your interface> set type monitor.
After that, bring the interface back up:: sudo ip link set <your interface> up. This ensures your Wi-Fi adapter is ready for packet capture
Finally, confirm the change by running iwconfig. You should see that your interface is now in monitor mode
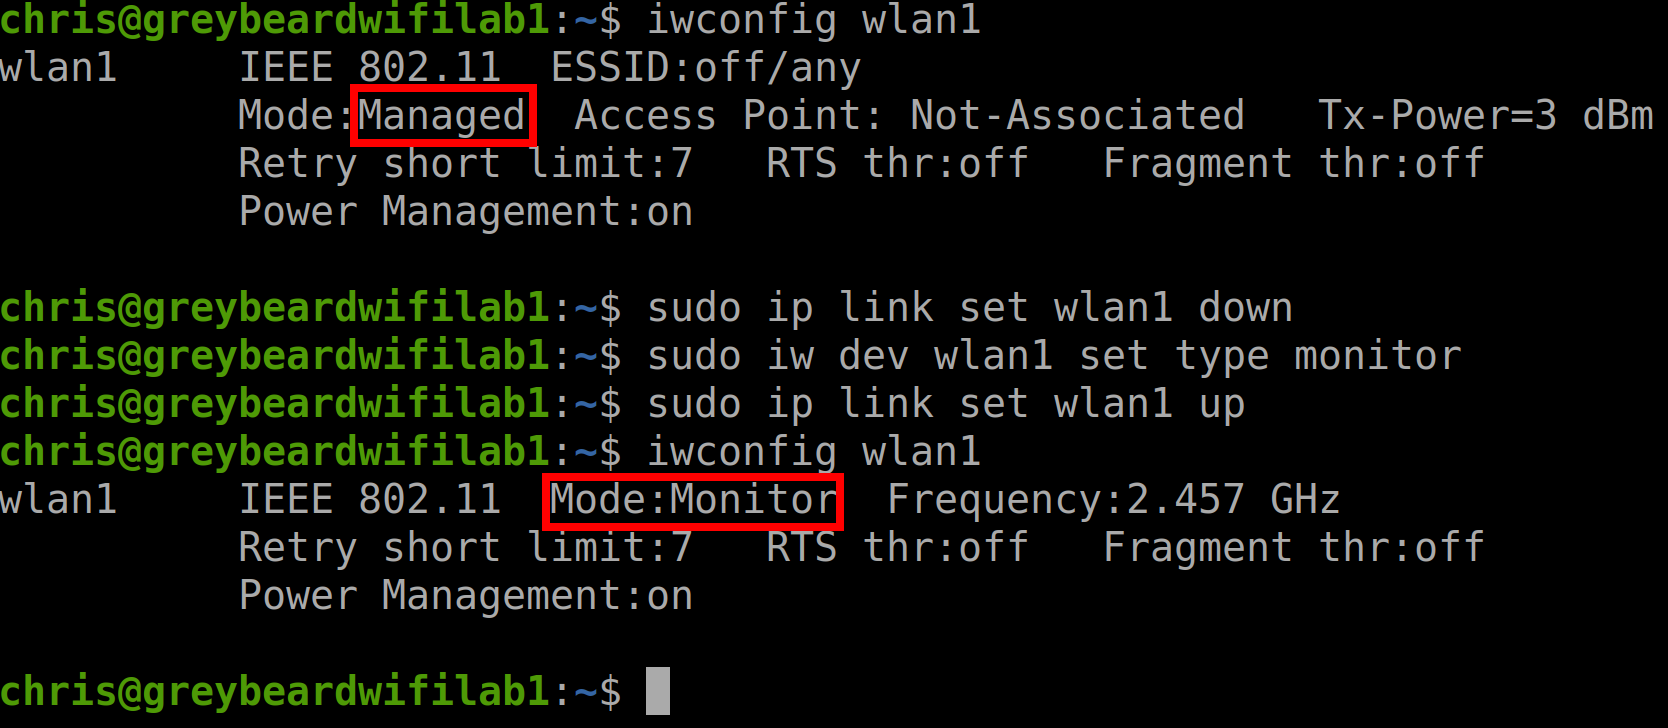
Here is an example of this method where we are putting wlan1 into monitor mode using ip link/iw dev:
Additionally, to put your interface back into managed mode, it is similar, take down the interface with sudo ip link set <your interface> down, then issue the command sudo iw dev <your interface> set type managed and last issue the command sudo ip link set <your interface> up.
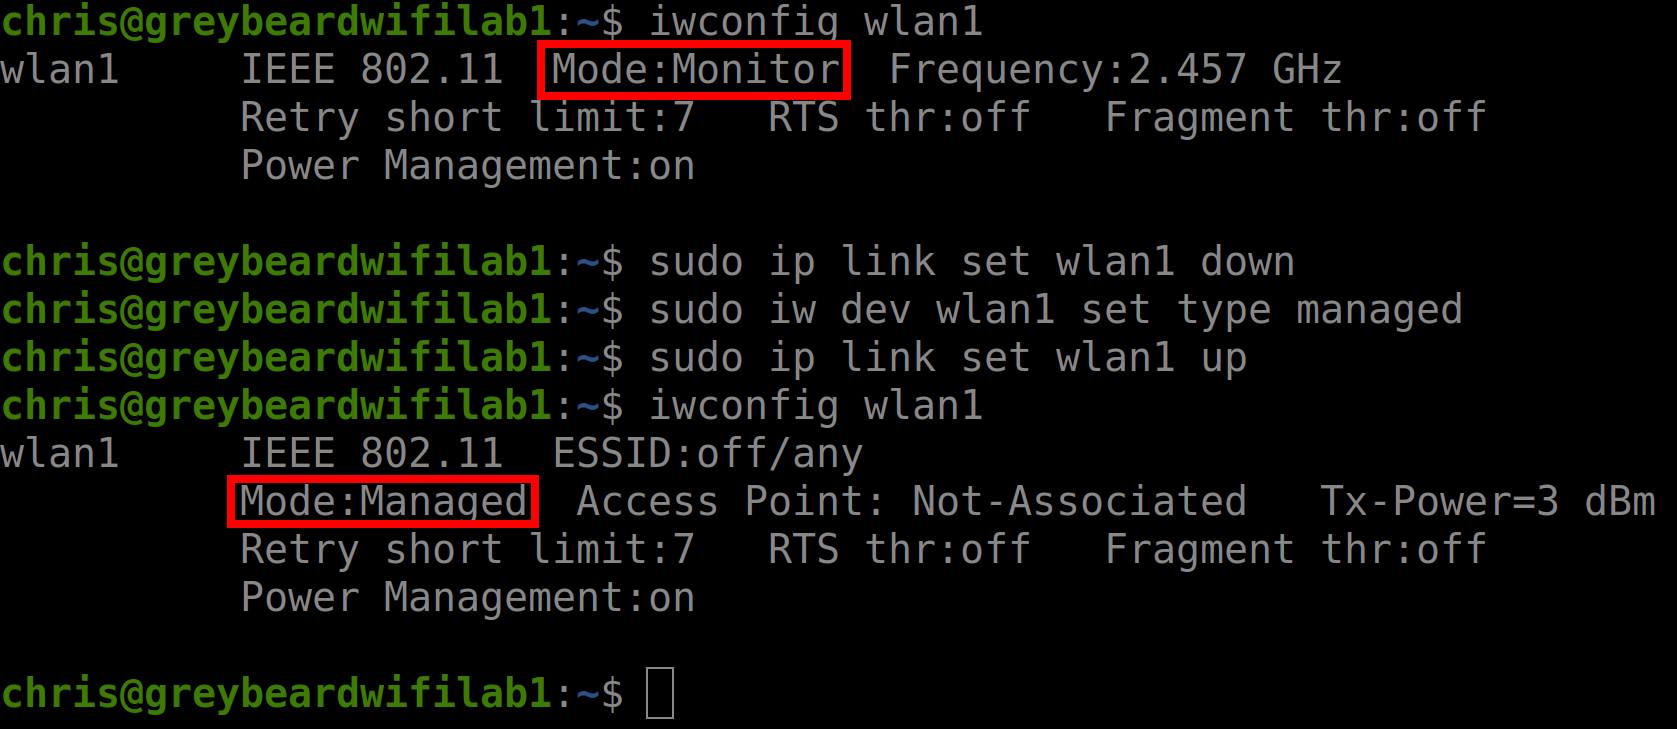
Here is an example of returning wlan1 to managed mode using ip link/iw dev:
Enable Linux WiFi Monitor Mode with airmon-ng
airmon-ng is a popular way of putting your Wi-Fi adaptor into monitor mode for auditing and pentesting. By default, many distributions don’t have airmon-ng installed. Make sure you have aircrack-ng installed. To install issue the command: sudo apt install aircrack-ng -y. Once installed, the airmon-ng to put your Wi-Fi interface into monitor mode are:
First check the interfaces status. I like to use iwconfig. If you just want to check the interface that you want to change into monitor mode, use the syntax: iwconfig <your interface>
Next, issue the command sudo airmon-ng start <your interface>.
Then verify that the interface has been put into monitor mode by using iwconfig <your interface>.
Note: the airmon-ng command will rename the interface. For example if you were to change wlan1 from managed to monitor mode, the new interface name will be wlan1mon.
Here is an example of using airmon-ng to change interface wlan1 into monitor mode:
To return the interface back to manage mode, simply execute the command sudo airmon-ng stop <your interface>. For example, if you want to return wlan1mon back to managed (wlan1), use airmon-ng stop wlan1mon
Enable Linux WiFi Monitor Mode with iwconfig
An older method that still works is to use the iwconfig command. Here are its steps
First bring the interface down; sudo ifconfig <your interface> down or the previous command sudo ip link set <your interface> down.
Next type the command sudo iwconfig <your interface> mode monitor. In our example we want to put wlan1 into monitor mode: sudo iwconfig wlan1 mode monitor
The, bring the interface back up with sudo ifconfig <your interface> up or sudo ip link set <your interface> up
Confirm the interface is in monitor mode by issuing the command iwconfig.
Here is an example of putting wlan1 into monitor mode using iwconfig commands
To return the interface back to managed mode:
sudo ifconfig <your interface> down
sudo iwconfig <you interface> mode managed
sudo ifconfig <your interface> up
iwconfig – to confirm that it is back in manage mode
I have also created a YouTube video on these and other Debian Linux distributions command line interface commands. Check it out:
Are you interested in a Debian Linux command line cheat sheet for Wi-Fi, click the button below to download

 :
: